DB system tip
data.instruments.get and updating a station's instrument list
It can be handy to know what instruments were deployed at a site when. For example, if an instrument was only connected to cpd2 during a short field campaign then that would minimize the amount of data you need to extract. While you may have this information permanently embedded in your brain or written in a notebook somewhere, the database system also provides a way to keep track of instrument deployments at a site. Another example where this could be useful is in identifying shifts in measurement values, i.e., seeing if a step-change in the data is associated with an instrument change.
The database (DB) system software allows you to see what instruments were at a site
and when they were there, using the command data.instruments.get.
To see what instruments were at a particular station and when
you would type in a terminal window of your AER_VM:
data.instruments.get stn
where stn would be the three letter id of the station (e.g., MLO or mlo).
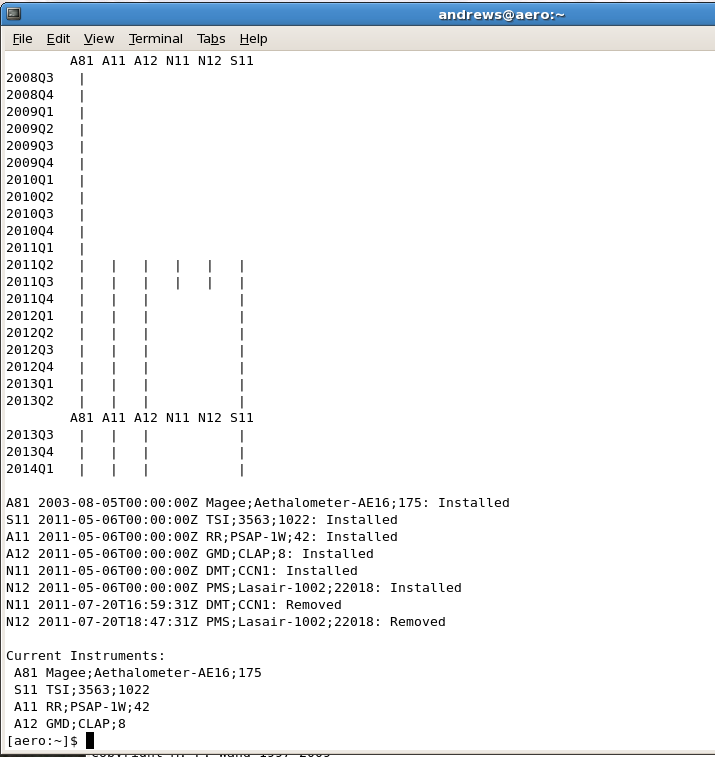
If this command is used for the Summit, Greenland site (SUM), the following is output:
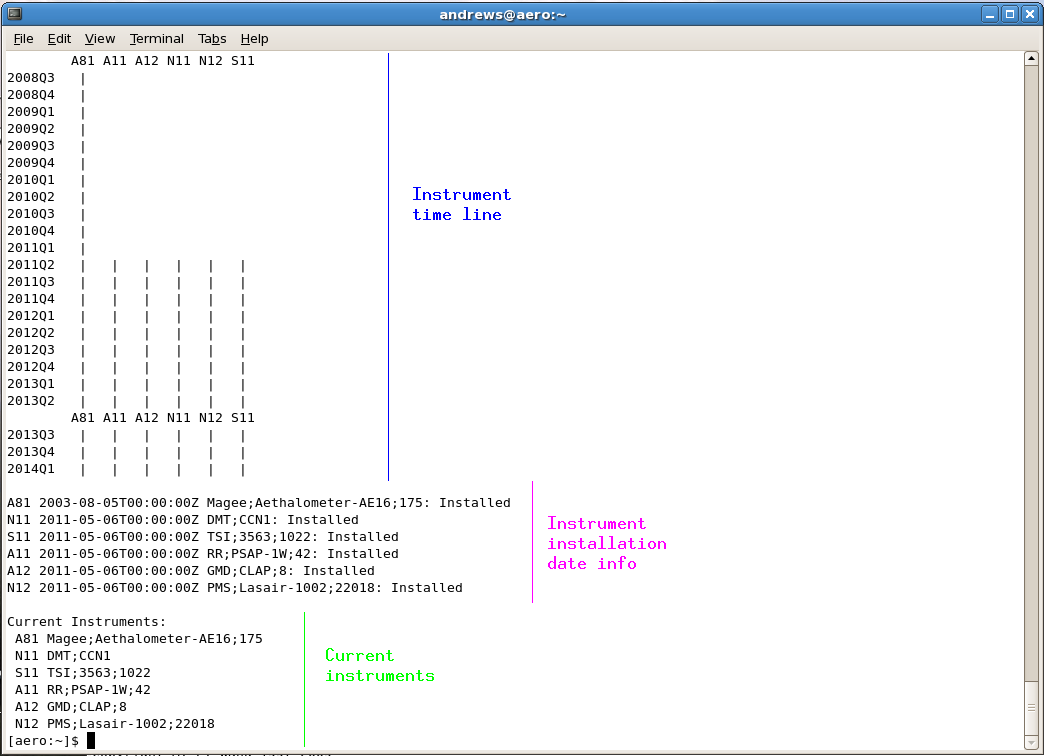
The first section is a time line indicating, by quarter, what instruments were collecting data. You can see
that instrument A81 (an aethalometer) had been sampling for much longer than the standard aerosol system instruments.
The next section gives installation dates and instrument info for each instrument. The final section
indicates what the current instruments are at the site.
In this Summit example, it turns out that N11 and N12 were only deployed for a brief field campaign and
that the instrument inventory at Summit should be updated. This is done using the segmentation feature in
the cpx2 data-viewing software. The segmentation feature is one of the options under the cpx2 pulldown
menu at the top left of the cpx2 window (yellow box below). When you choose the segmentation option
you will get the following:
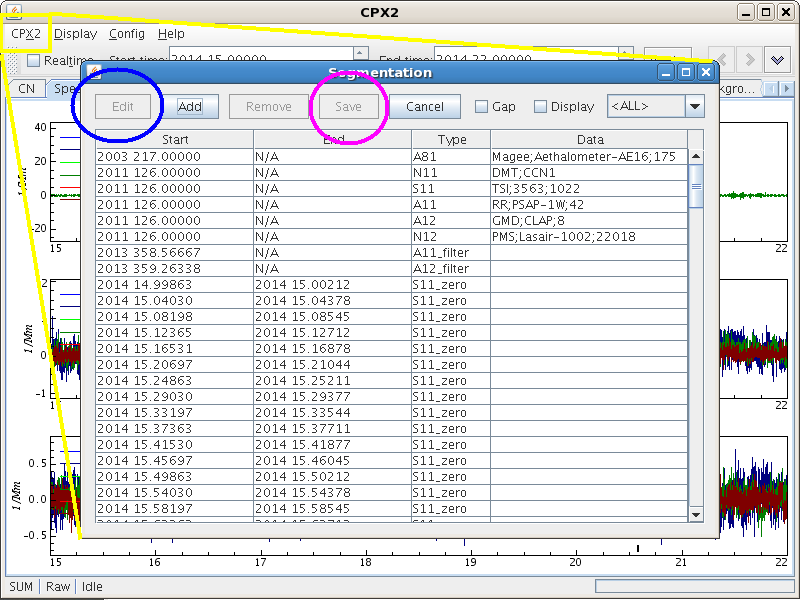
At the top of the segmentation pane you see the list of instruments with start dates, but no end dates.
If you click on the N11 listing in the segment pane to highlight it and then chose the option 'edit'
(blue circle above) a smaller pane will pop up:
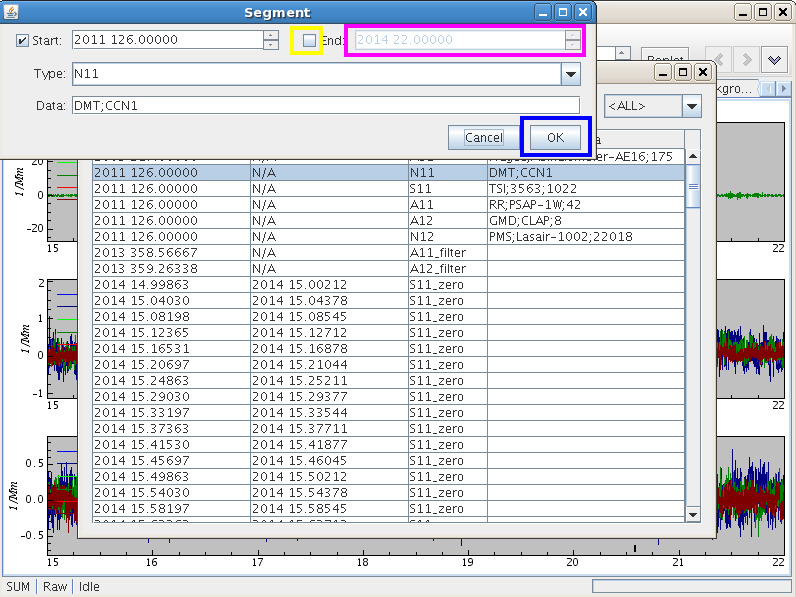
Check the 'end' square (yellow box above) and fill in the space (pink box above) indicating when that
instrument stopped sampling. Then choose 'ok' (blue box above). Choosing 'ok' will close the small
segmentation edit pane and take you back to the main segmentation pane. Finally, to save the changes you made
click 'save' (pink circle on first cpx2 picture). Quit cpx2 and run data.instruments.get again - you should see your updates: